Already have a hosting plan and access to cPanel, but don't know where to set up an email for your business? This article will help you. Learn everything you need to know about creating and managing email accounts.
Where Are the E-mail Settings Located in cPanel?
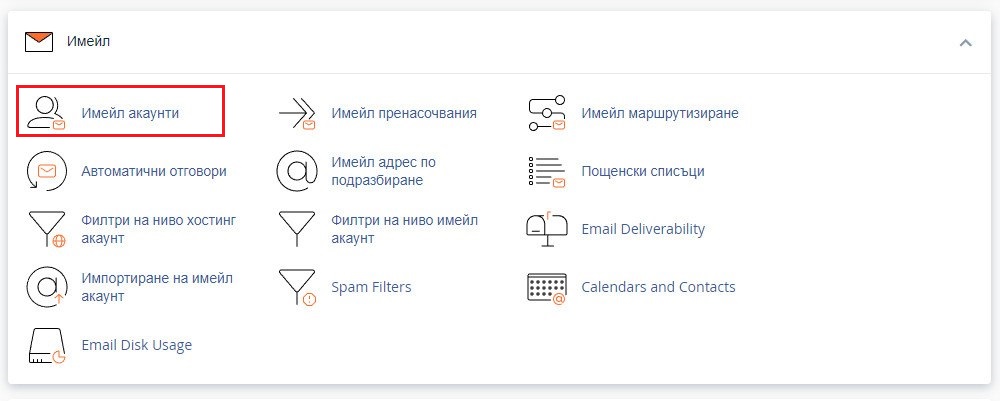
After logging into the Control Panel or cPanel, you will find the functions required for email control in the "E-mail" area. This area contains all processes related to the management of e-mail accounts. The creation, management and deletion of e-mails is carried out via "E-mail accounts".
You can find out more about the possibilities offered by cPanel in our article - What is cPanel and what is it used for?
What options does the "Email accounts" section offer?
Before we introduce you to all the options in the "Email accounts" section, let us take a look at its user interface.
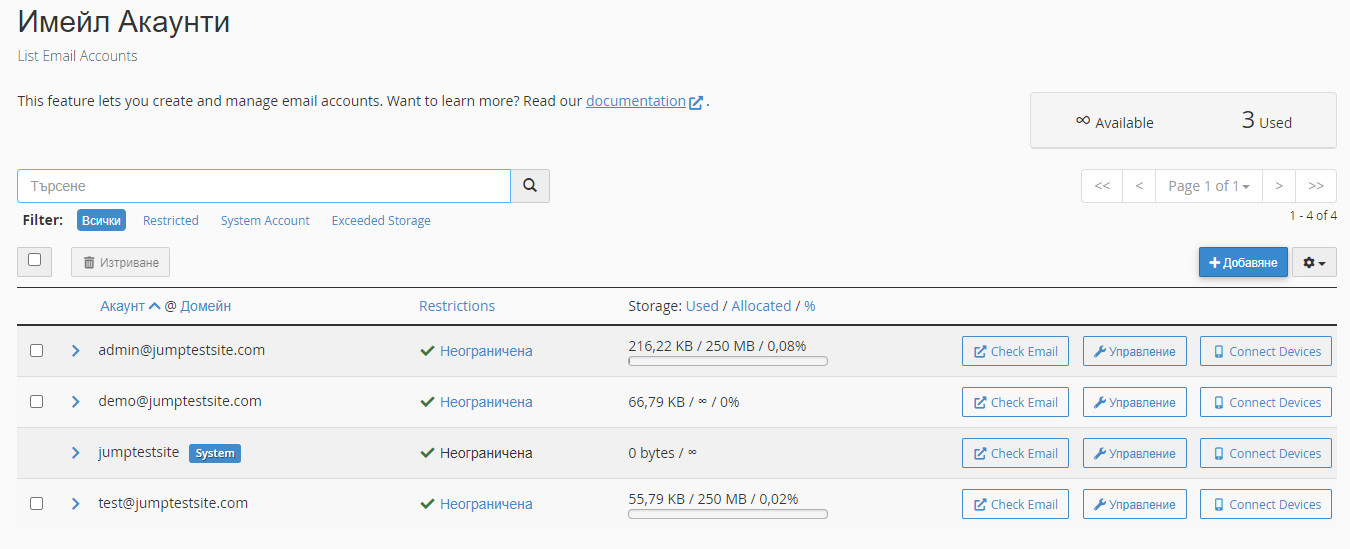
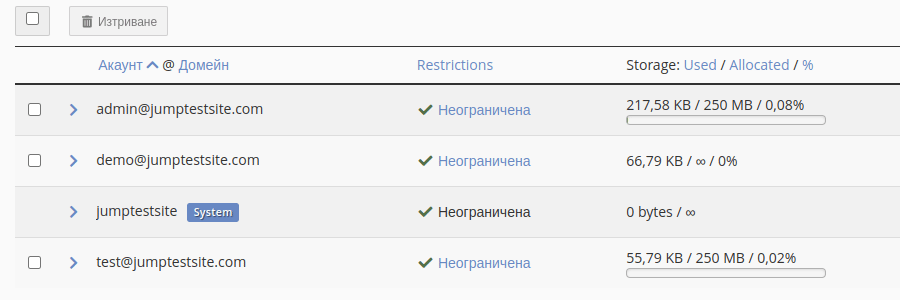
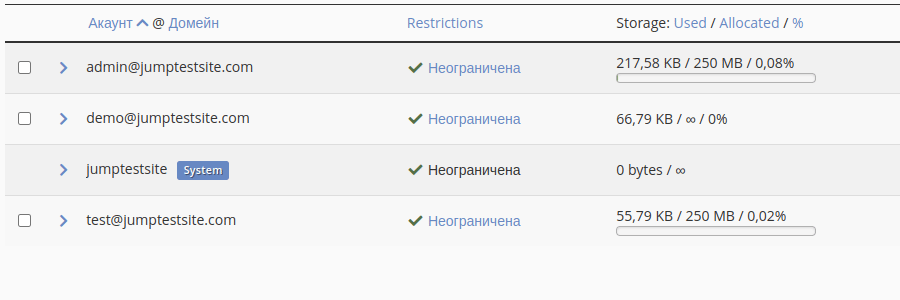
At the top of the page you will find a search engine with the option of filtering the results. The main content of the page is displayed in the form of a table. It shows the available e-mails. They are displayed as rows in the table itself.

Here we look at the information and options for various actions that the table offers:
- Checkbox for the selection. More than one line can be selected.
- A detail button that allows you to show or hide the additional information for a particular row.
- Name of an existing email account.
- Limited. A link that redirects you to a page with editing rights for the account in question. These rights are limited to receiving and sending messages and accessing the account. (By default, these operations are allowed).
- The total storage space allocated for storing messages for the respective user. The field shows the amount of disk space still in use and the percentage of disk space the user can work with.
- A link that redirects to Webmail.
- A button that links to a page with additional functions for the email account.
- Links to a page with specific settings that are required when configuring email clients such as Mozilla Thunderbird, Microsoft Outlook, MacOS Mail, IncrediMail, Mailbox and others.
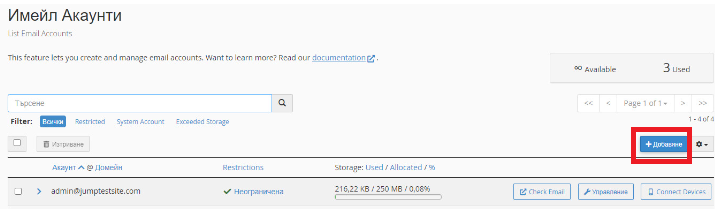
How Do I Create an Email Account?
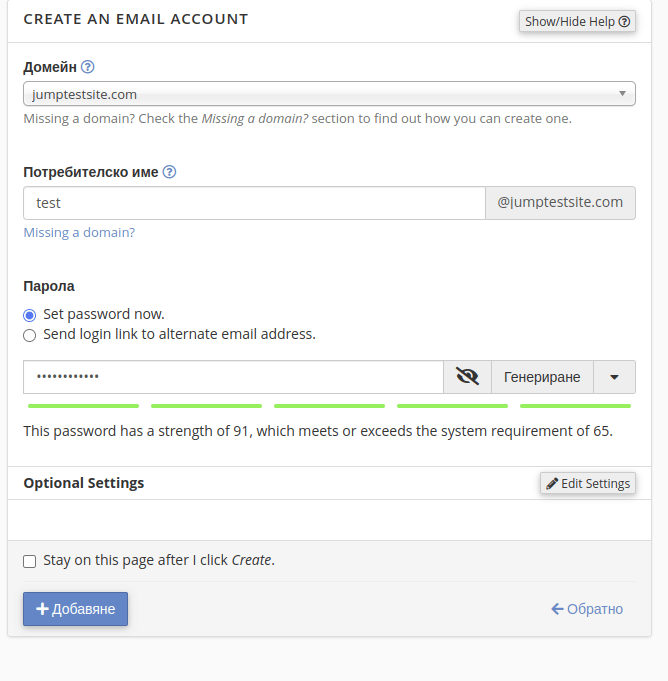
Once you are in the "Email accounts" section, you must click on the "Add" button.
You Will Be Redirected to the “Create an Email Account” Function.
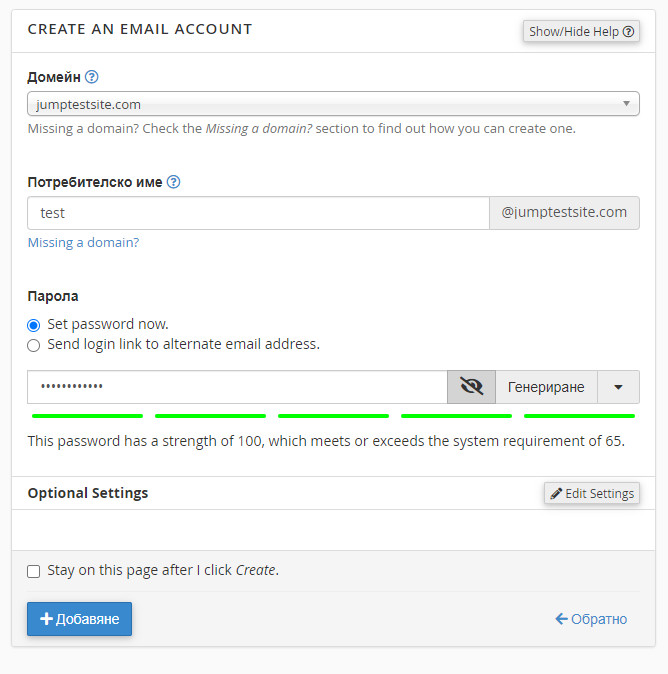
To create a new e-mail account, you must fill in the required fields, namely:
- Domain - A drop-down list containing all available domains and subdomains.
- Username - Text field to enter the name of the email account. The final version of the email should be
potrebitelsko_ime@Domain
- Password - You have two options for entering a password:
Option 1
To enter a password in the current window. The password must contain at least 5 characters and you can track its security level in real time. It is recommended to use a combination of several characters for your own password. You also have the option of generating a password using the corresponding button. The password you enter must have a minimum strength of 65.
Option 2
Specify an alternative email address to which a password reset link can be sent. Thank you to this option, the user who will use the email can create a password themselves.
Please note that in case of an empty field or incorrectly entered information, you will receive a corresponding error message on the same page.
If you want to learn more about securing your hosting account, read our article How to secure your Jump account with two-factor authentication?
Once you have entered the information in the fields provided, you can also make additional settings.
Additional settings or optional settings are displayed in GIF 1. You can access them by clicking on the "Edit settings" button.
You can edit the following settings in the "Optional settings" section:
- Mail storage space;
- Option to create specific folders in the addressable account;
- Option to enable or disable a welcome message with instructions for the mail client.
Once you have filled in the empty fields with information and made the additional settings, you can successfully create an email account by clicking on the "Add" button. This account will be displayed in the table with all available email accounts.
What Are the Options for Managing an Email Account?
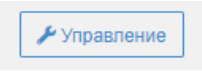
The button of the same name in the table with the available e-mail accounts links to a page with administration options.
There you have the option of changing all settings from the creation step, with the exception of the user name and the domain. The possible operations that can be changed are
- Change password;
- Edit the allocated storage space for use;
- The option to automatically create folders for plus addressing.
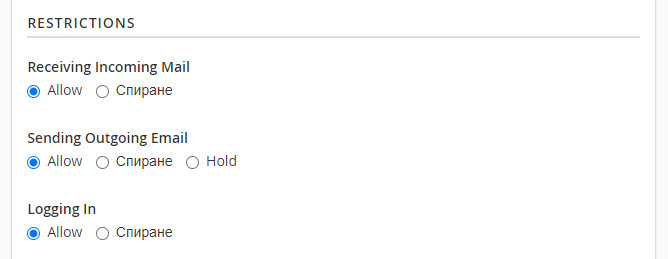
- On the administration page, you can also set restrictions for:
- Receiving messages;
- Sending messages;
- Access by account.
The page also allows you to delete the mail user.
How Do I Delete an Email Account?
There are several ways to delete an email account. Here they are:
Option 1
From the table of email accounts (GIF 2). Select an email account to be deleted by highlighting it in the first column of the table. You can select more than one. Click on the "Delete" button located directly above the table.
Option 2
Via the button Table details. The advanced options are displayed in GIF 3.
Option 3
On the Manage page. The Delete button is at the bottom of the menu.
It is important to know that after deleting an email account, all its information (sent and received messages) will also be deleted.
We hope that we have helped you with the creation, management and deletion of emails. If you have any questions about this option in cPanel, you can contact the support team at support@hostingjump.com.