When you have a successful WordPress website or a WooCommerce online store, you'll have to test some new options. And here comes the question - how to do it without affecting the website? The answer is - to use a staging site!
What Is a Staging Site?
A staging site is a duplicate of your website that is used to test changes and fix bugs before you make it available to the public. This copy allows you to update plugins, and test and change themes without breaking your website.
Why Use a Staging Site?
- You have the opportunity to work on developing the design of your website without it being published online.
- You have time to work out all the bugs before your website goes live.
- A platform where you can test different options
In this material, we show you how you can easily create a working environment for your WordPress site at hostingjump.com, completely free of charge.

How to Build a Staging Site?
Here is a step-by-step guide on how to build a staging site.
1. Set up a Subdomain in cPanel
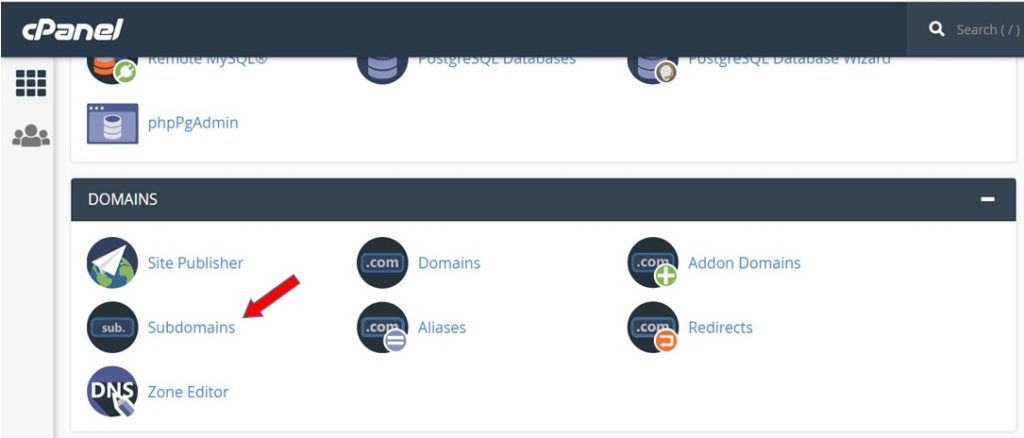
In the Domains module, select the Subdomains option. Select a name for your subdomain and create it.
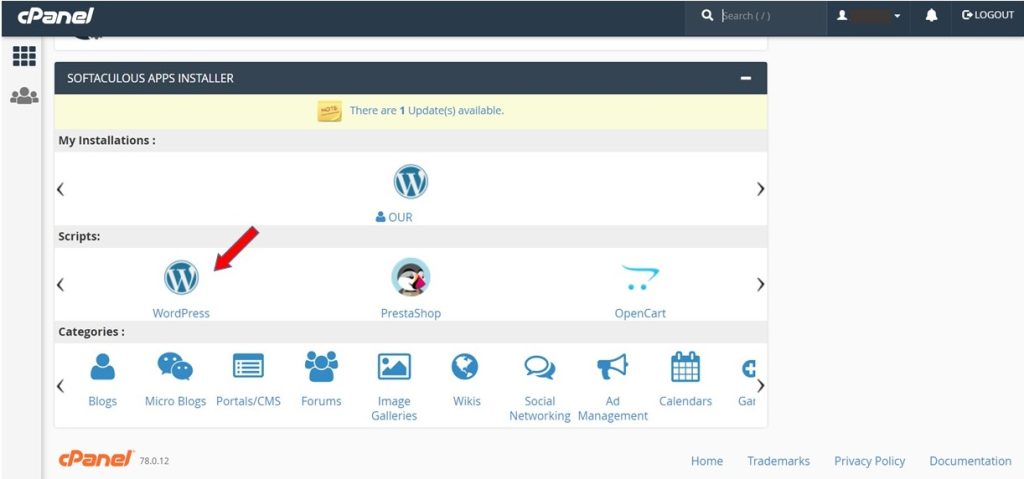
2. In cPanel Find the Softaulous Module and the Installed WordPress
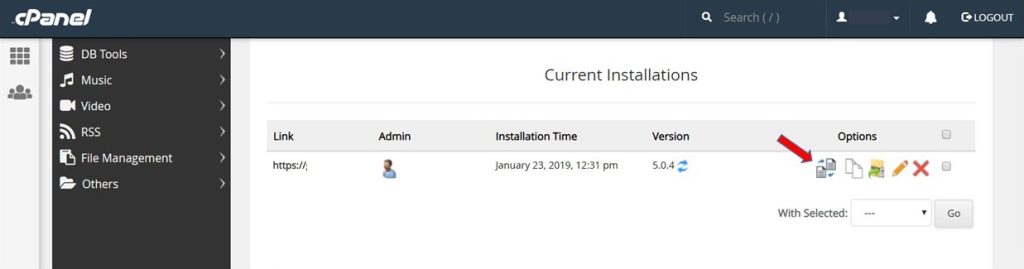
3. Select the Website Where You Want to Create a Staging Site
Select the website where you want to create a staging site and the first option "Create staging" will allow you to quickly create on.
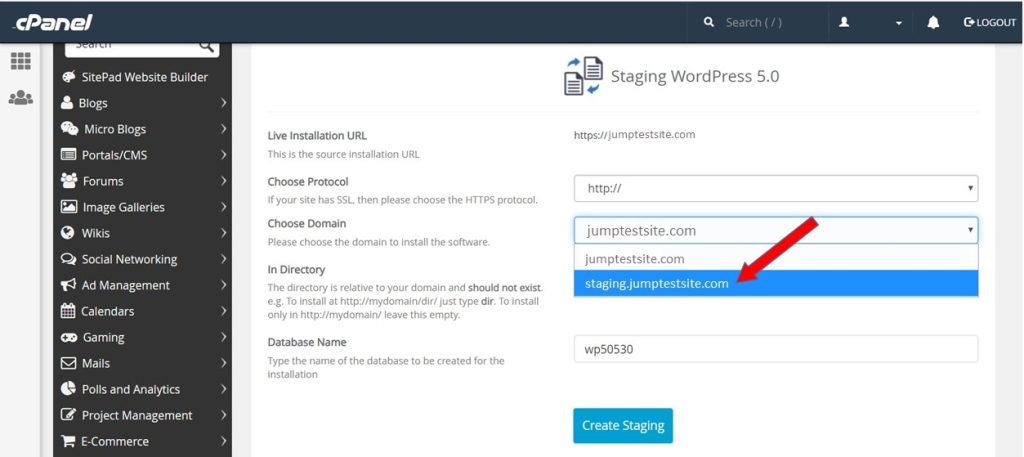
4. Select the Subdomain and Create Your Staging Options
Select the subdomain and create your staging options using the Create staging button.
Note: To use this function, your app must be installed via Softaculous. If it was installed manually or transferred from another hosting account, you can easily import it into Softaculous by following the steps described here.
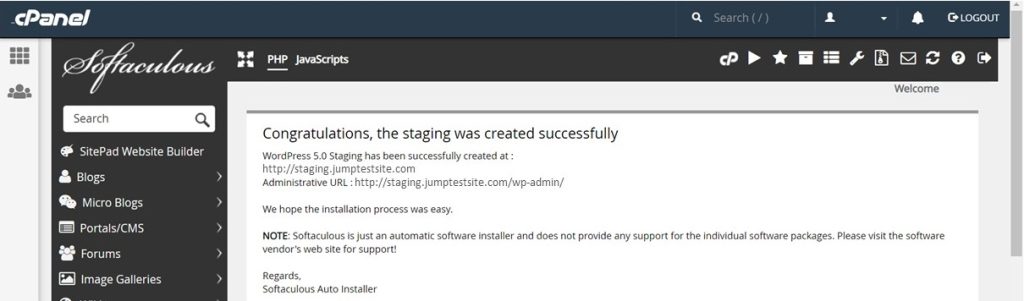
After you have created the working copy, the files of your website are copied to a separate directory. Your staging site is automatically set to a different address than the real site.
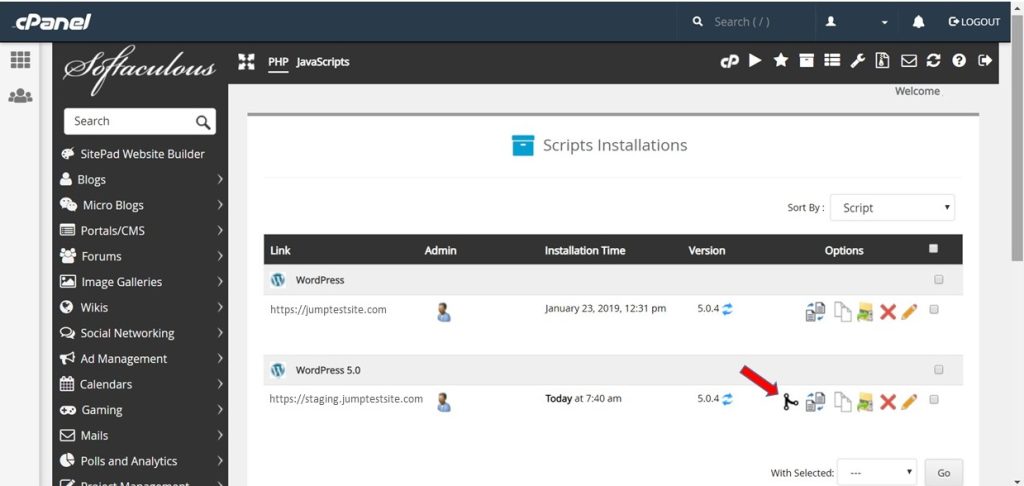
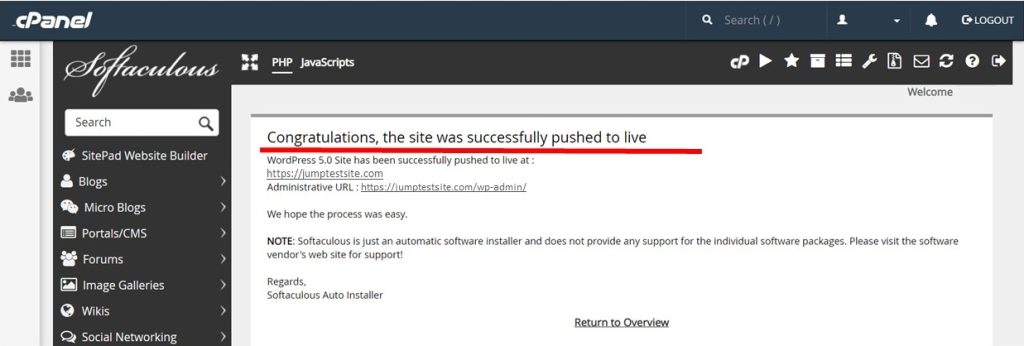
5. Push the Changes to the Real Website
Once you have made the changes and tested that everything works, you should push them to the real website. This is achieved through the Push to Live option.
Before you apply the changes you have made to your real website, we recommend that you download backups. A backup system is available with each website hosting plan.
Select an option to upload the changes. If you select the Default option, all files (content) of your staging site will replace the files of the real site. With the Customise option, you can make personal settings for uploading changes (whether content should be overwritten, information completely replaced, etc.).
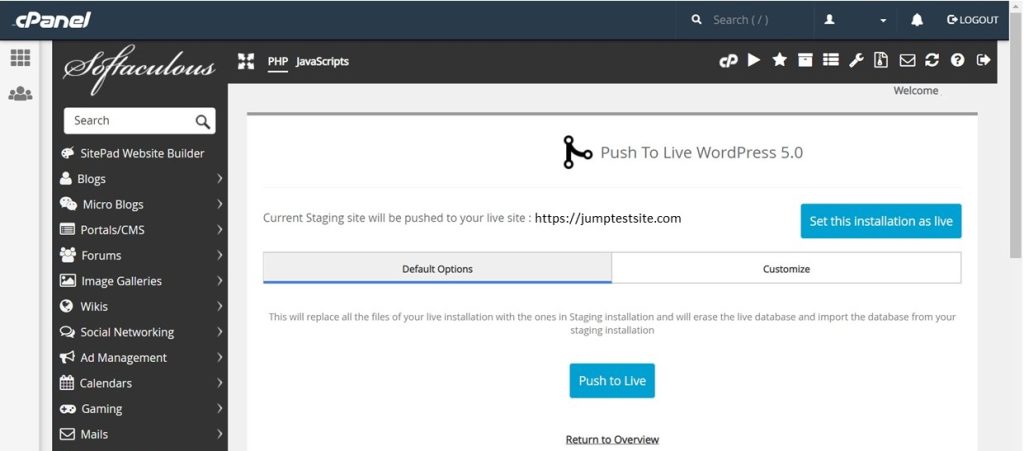
Once you have selected and made your upload settings, click on the Push to Live button. A message will appear on the screen to confirm the action performed.
Note: You have the option of continuing to edit your staging site or deleting it from your hosting account. These options can be done via your cPanel > Softaculous.
Each subsequent version of WordPress includes important improvements and changed features that sometimes cause errors and "break" sites. For your convenience and security, you should create and use a staging site.
Have you encountered this message on your site: "There has been a critical error on this website"? Here's an easy fix for the WordPress critical error.