Setting up your Microsoft Outlook mailbox yourself is a simple process that doesn't take much time. In this article, we'll show you how to set up your email client yourself in just a few steps so that your emails work properly.
How to add an email account to the Microsoft Outlook email client?
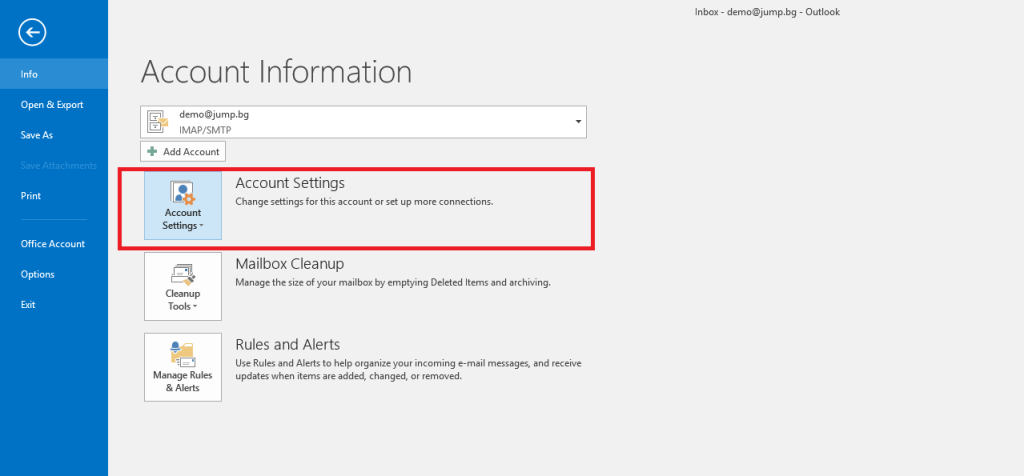
- Open Microsoft Outlook
- To add an email in Outlook, go to:
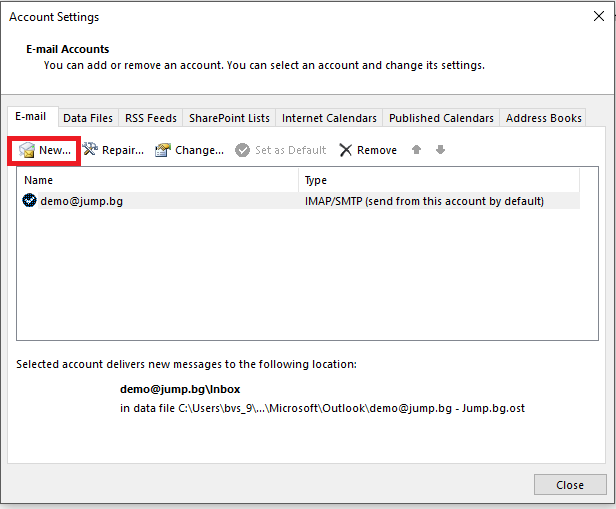
"Account Settings" → On the "Email" tab, select the "New" option
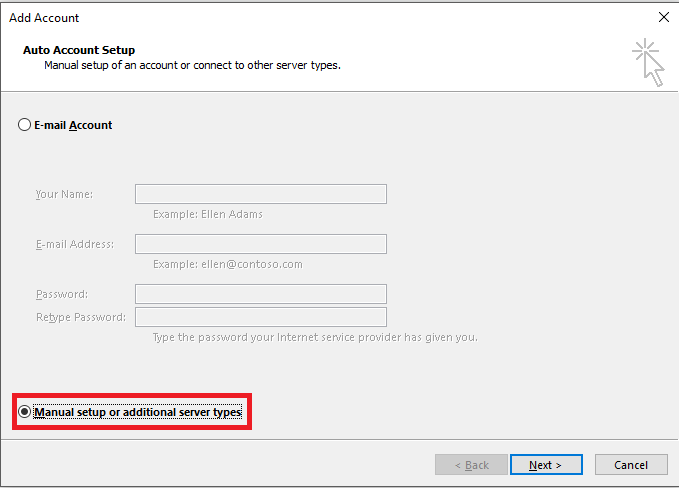
- In the window that now appears, select the option "Manual setup of an email account and/or additional settings" ("Manual setup or additional server types") and then click on the "Next" button
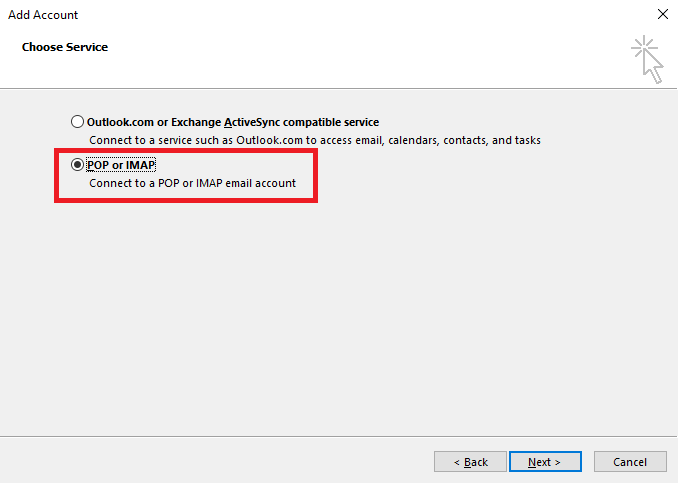
- In the next step, select the email account you want to set up. You have the choice between "POP or IMAP" (POP or IMAP) and we go to the next step "Next" ("Next").
What Is the Difference Between the POP3 and Imap Protocols?
POP3 - if you choose this protocol, you should keep in mind that all emails you receive will be downloaded/saved to your desktop email client. Of course, with this protocol, you can also request that all your emails are stored on the mail server, but this is not provided by default.
IMAP- is the newer protocol for retrieving emails. With it, the letters are downloaded and managed by the mail server, which means you can take advantage of benefits such as:
- Checking the email account from several different client devices.
- Storage of emails on the server itself.
In addition to setting up an email account in Microsoft Outlook, you can also familiarize yourself with the basic email settings in cPanel - this is the control panel you use to manage your hosting service.
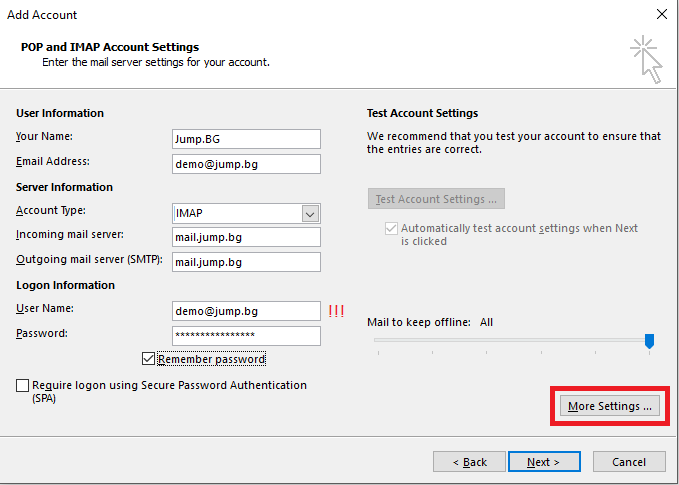
- Fill in the Details of Your Email Account:
User information:
Your name - Enter your name or the name of your company here
Email address - enter your full email account here (for example demo@jump.bg)
Server information:
Account type - from the drop-down menu, select whether you want to set up a POP3 or IMAP account
Incoming mail server - enter the name of the email server through which you receive your messages. In most cases, the outgoing mail server has the following name "mail.yourdomain.com" (replace "yourdomain.com" with your domain. For example: mail.jump.bg0
Outgoing mail server (SMTP) - you specify the name of the mail server you will use to send the emails. The incoming and outgoing server almost always have the same name (mail.yourdomain.com)
*Check your email servers, starting from the first email ("Welcome") you received from the hosting company Jmp.bg when you activated your service.
Input data:
User name: You must enter the full email address here (demo@jump.bg), otherwise you will receive a message that the data entered is incorrect.
Password: Enter the password for your email account
To avoid having to re-enter your password each time, you must have activated the "Save password" option
After you have entered the data, select the "More settings…" button to open a new window in which you must make the settings for the outgoing mail server.
Here it is important to select the option "My outgoing server (SMTP) requires authentication" and ensure that the authentication method "Use the same data for the incoming server" is selected.

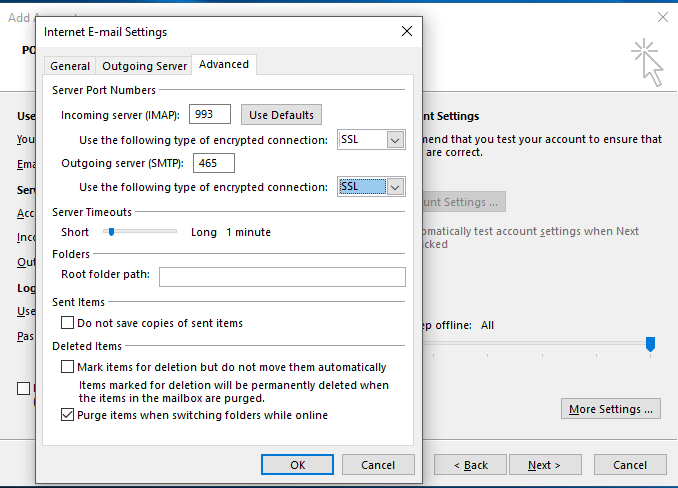
After you have made the settings in the "Additional settings" section, go to the "Advanced" section. Here you specify the ports via which you will connect to your server:
Ports for unencrypted connection (without SSL):
- IMAP port: 143
- POP3 port: 110
- SMTP port: 25
Important: If you use these ports, your e-mail will be transmitted via a non-encrypted connection (non-SSL)
Ports for encrypted connection (with SSL):
- IMAP port for SSL connection: 993 (recommended)
- POP3 port for SSL connection: 995 (recommended)
- SMTP port for SSL connection: 465 (recommended)
- SMTP port for TLS/STARTTLS connection: 587
Important: If you select a port for an SSL connection, select SSL in the drop-down menu below the input field for the port.
If you use these ports, your email communication will run via an SSL-encrypted connection. To use these ports, you must have an SSL certificate installed on your email server.
We provide a FREE SSL certificate for every email server.
Depending on which protocol you use for the incoming mail server, POP3 or IMAP, you only need to fill in this port (in the previous step 3 you selected POP3 or IMAP, these are the settings of your e-mail account)
Once you have entered everything, click on the "OK" button
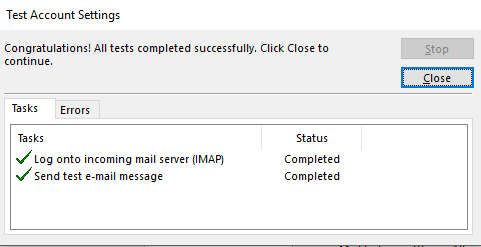
You have almost reached the end of the settings required to get a mailbox up and running in Microsoft Outlook.
Select the "Next" button. This will check the settings you have entered. If you have done everything correctly, you should see the following window: